

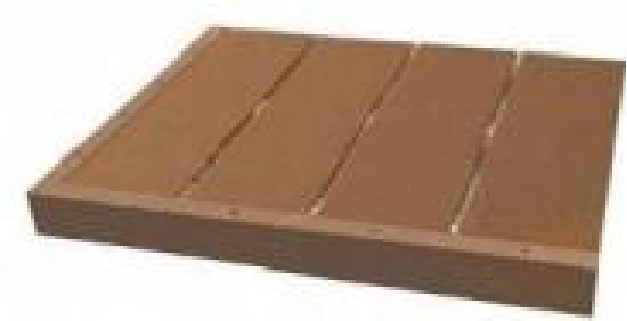
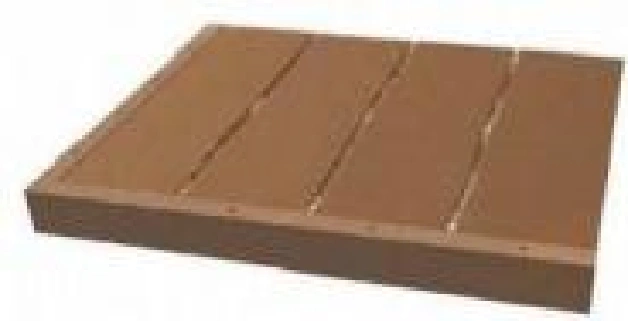
2rd Round Hole WPC Decking
140*25
Product Features & Benefits
Eco-Friendly & Healthy Living
Made from premium HDPE recycled materials and plant fibers, our WPC products are produced using high-temperature, high-pressure extrusion technology. The manufacturing process is free of harmful additives, ensuring a green and eco-friendly product that protects your family's health.
Certified by SGS and other international testing agencies for safety and environmental standards.
Durable & Maintenance-Free
- Manufactured using advanced high-temperature extrusion technology with excellent mechanical and thermal stability. High density, superior to traditional wood in hardness and compression resistance. No cracking, no deformation - the ideal outdoor building material.
- Waterproof, moisture-proof, anti-mold, anti-corrosion, and acid-alkali resistant. Fire rating reaches B1 level. Theoretical service life exceeds 30 years.
- No painting or staining required. Color remains consistent with UV-resistant pigments and anti-aging additives from Germany's BASF. Strong color stability with excellent anti-fade performance for 20+ years.
- Wide range of applications: decking, fencing, pergolas, pavilions, villas, exterior wall decoration, flower boxes, park benches, and more. Suitable for residential, commercial, and government projects. Exported worldwide with proven performance.
Using WPC is Protecting the Environment
Research data shows that using 1 square meter of WPC can protect a 10-year-old tree. Every ton of WPC composite material used to replace natural wood can reduce carbon dioxide emissions by 7.5 tons. As a responsible manufacturer, we are committed to sustainable development and creating green, eco-friendly, healthy living environments for every household.
Energy Saving & Environmental Protection
- Customizable dimensions based on actual project requirements, minimizing material waste and reducing unnecessary energy consumption.
- Scrap materials and old products from demolition can be 100% recycled and reused, reducing environmental pollution and landfill waste.
- Promoting circular economy and resource regeneration. Contributing to carbon neutrality goals and harmonious coexistence between humans and nature.
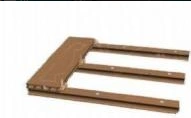
Application Scenarios
Installation Guide
Component Reference:
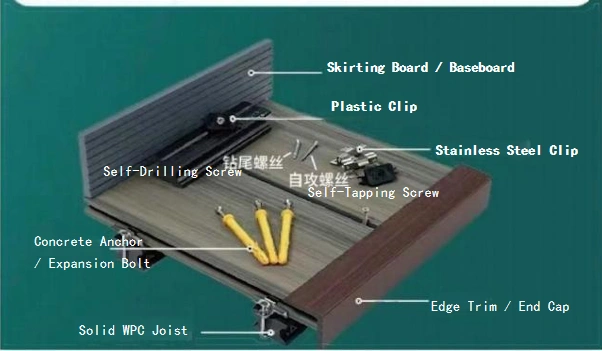
Figure 1: 8 Key Installation Components
Installation Method:
Check if the concrete surface is level before installation. Ensure the subfloor is clean, dry, and structurally sound.

Secure the first WPC board to the joist with screws to prevent slipping. Use self-drilling screws for metal joists or self-tapping screws for wood joists.
Insert clips into the side grooves of the board and secure to the joist with screws. Do not fully tighten yet - leave slightly loose for adjustment.
Place the next board, align the groove with the clip, and tighten with screws. Repeat this process for all remaining boards.
For the last board, secure directly to the joist with screws at the clip positions. Ensure proper spacing from walls for expansion.
Finally, attach the edge trim (end cap) to cover the board edges, securing with screws. Install skirting board along walls for a finished look.
Important Installation Note:
Pre-drill all holes before inserting screws for all WPC products to prevent material splitting and ensure proper fastening.
Standard Hardware Requirements (per sqm):
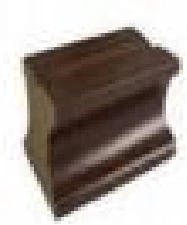
Figure 8: Hardware quantity reference
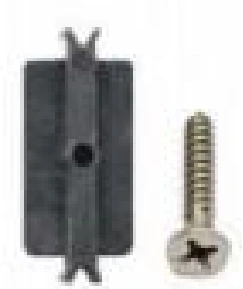
Figure 9: Hardware components detail
Product Details
Product Details
Premium WPC Decking: Your Guide to Durable, Eco-Friendly Outdoor Living
1. Product Description
Elevate your outdoor space with our high-performance Wood Plastic Composite (WPC) Decking. Engineered for the modern homeowner, it perfectly blends the warm, natural aesthetics of wood with the unmatched durability and low maintenance of advanced composites.
Core Advantages:
Eco-Conscious Choice: Crafted from a blend of recycled wood fibers and plastics, our decking supports a sustainable lifestyle without compromising performance.
Built to Endure: Superior resistance to moisture, rot, insect damage, and UV fading ensures your deck retains its beauty and structural integrity for decades.
Zero-Hassle Maintenance: Say goodbye to annual sanding, staining, or sealing. Enjoy more time relaxing and less time working on your deck.
Safety & Comfort: Features a slip-resistant surface for safer wet-weather use and a comfortable underfoot temperature compared to traditional materials.
Modern Aesthetics: Available in a variety of realistic wood-grain textures and contemporary colors to complement any architectural style.
Ideal For: Patios, pool surrounds, garden pathways, rooftop terraces, and commercial outdoor spaces.
2. Usage & Care Instructions
One of the greatest benefits of WPC decking is its simplicity. Follow these easy steps to keep it looking pristine.
Regular Cleaning: For routine cleaning, simply sweep away debris and wash the surface with a mild soap (e.g., dish soap) and water solution using a soft brush or cloth. Rinse thoroughly with a garden hose.
Stain Removal: For common stains like grease or dirt, use a dedicated composite deck cleaner. Apply according to the manufacturer's instructions and rinse well. Avoid using harsh chemicals, abrasive cleaners, steel wool, or undiluted bleach.
Avoidance:
Do not use a pressure washer on a high-pressure setting, as this can damage the surface texture.
Avoid dragging heavy, sharp-edged furniture or equipment across the deck. Use furniture pads or cups.
While highly resistant, it’s best to promptly clean up spills from highly pigmented liquids (like red wine) or oily substances.
3. Installation Guide
Our WPC decking system is designed for quick installation with standard tools, saving you time and labor costs.
Important Note: This is a general guide. Always consult and follow the specific installation instructions provided with your purchase. Local building codes must be observed.
Step 1: Planning & Preparation
Check Local Regulations: Obtain any necessary permits and ensure your design complies with local building codes.
Design & Layout: Plan your deck layout, including stairs, rails, and any cut-outs. Remember to account for expansion and contraction by planning for gaps (see Step 3).
Substructure (Joists): Ensure your joist frame is level, square, and structurally sound. Joists should be spaced according to the decking board specifications (typically 12" to 16" on center for our products).
Slope for Drainage: The frame must have a slight slope away from any building (minimum 1/4 inch per foot) to ensure proper water runoff.
Step 2: Installing the Starter Clip & First Board
Starter Position: Place the first board along your starting edge, ensuring it is perfectly straight and aligned.
Fastening: We recommend using the hidden fastening clip system for a clean, screw-free finish. Place the starter clips onto the joists at the starting edge and slide the first board into place, securing it with screws through the clip into the joist.
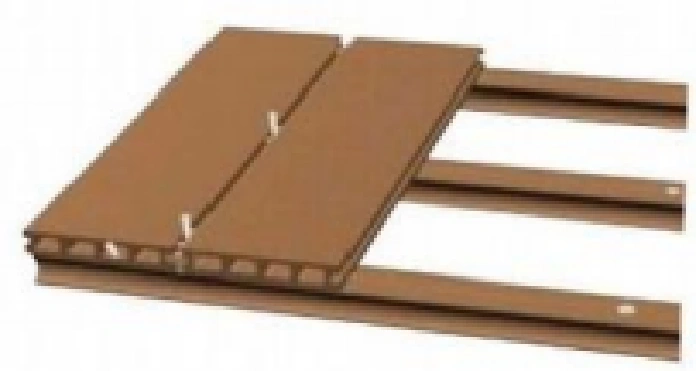
Step 3: Installing Subsequent Boards
Place Fastening Clips: For each joist position along the next board's run, place a standard hidden clip onto the joist.
Connect Boards: Align the next board with the previous one and gently tap it into the clips using a mallet and a tapping block to protect the board edge.
Expansion Gaps: Maintain a consistent side-to-side gap (typically 1/8 inch) between boards as specified in your manual. This is crucial for thermal expansion.
Step 4: Finishing & Final Board
Final Board Installation: The last board may need to be ripped to width. Use a carbide-tipped saw blade for a clean cut. A fascia board or picture-framing technique is often used to cover the cut end and exposed fasteners for a professional finish.
Perimeter Trimming: Install trim or fascia boards around the deck perimeter to conceal the joist ends and frame, giving your deck a polished look.
Step 5: Post-Installation Check
Walk the entire deck to ensure all boards are securely fastened and there is no noticeable movement.
Clean the deck surface to remove any installation debris.
Ready to transform your outdoor living? For detailed technical specifications, color options, or to request a quote, please contact our team.


You May Also Like

Round Hole WPC Decking
View Details
3rd Round Hole WPC Decking
View Details